Contact Cooling in Laser Treatments: Comfort and Safety in Every Pulse
Cooling protects skin and improves comfort during laser procedures. It also helps you hold your settings inside a safe range. This article explains how contact cooling works, how to use it with timing and technique, and how to avoid common mistakes that lead to complications.
You will see where cooling fits in the five key parameters you already use. You will also learn when to rely on cooling and when to adjust wavelength, fluence, pulse duration, spot size, or repetition rate instead. If you want guided practice, enroll in the Live Course or start the Online Course. Many of the points here reflect research listed on ResearchGate.
What Contact Cooling Does
Contact cooling removes heat from the epidermis before, during, or after a laser pulse. You lower surface temperature so that the skin can tolerate the thermal load created by absorption in the target. You also reduce pain by cooling nerve endings near the surface.
- Epidermal protection: Cooling lowers peak skin temperature and reduces risk of burns and pigment change.
- Comfort: Cooler surface temperature reduces pain perception, which allows you to complete a field with fewer pauses.
- Consistency: Stable cooling conditions create stable endpoints as you move across large areas.
Cooling does not change the physics of the target. It does not raise the thermal relaxation time or alter chromophore absorption. It protects the surface while you apply correct parameters to the target beneath it.
Common Cooling Methods and How They Work
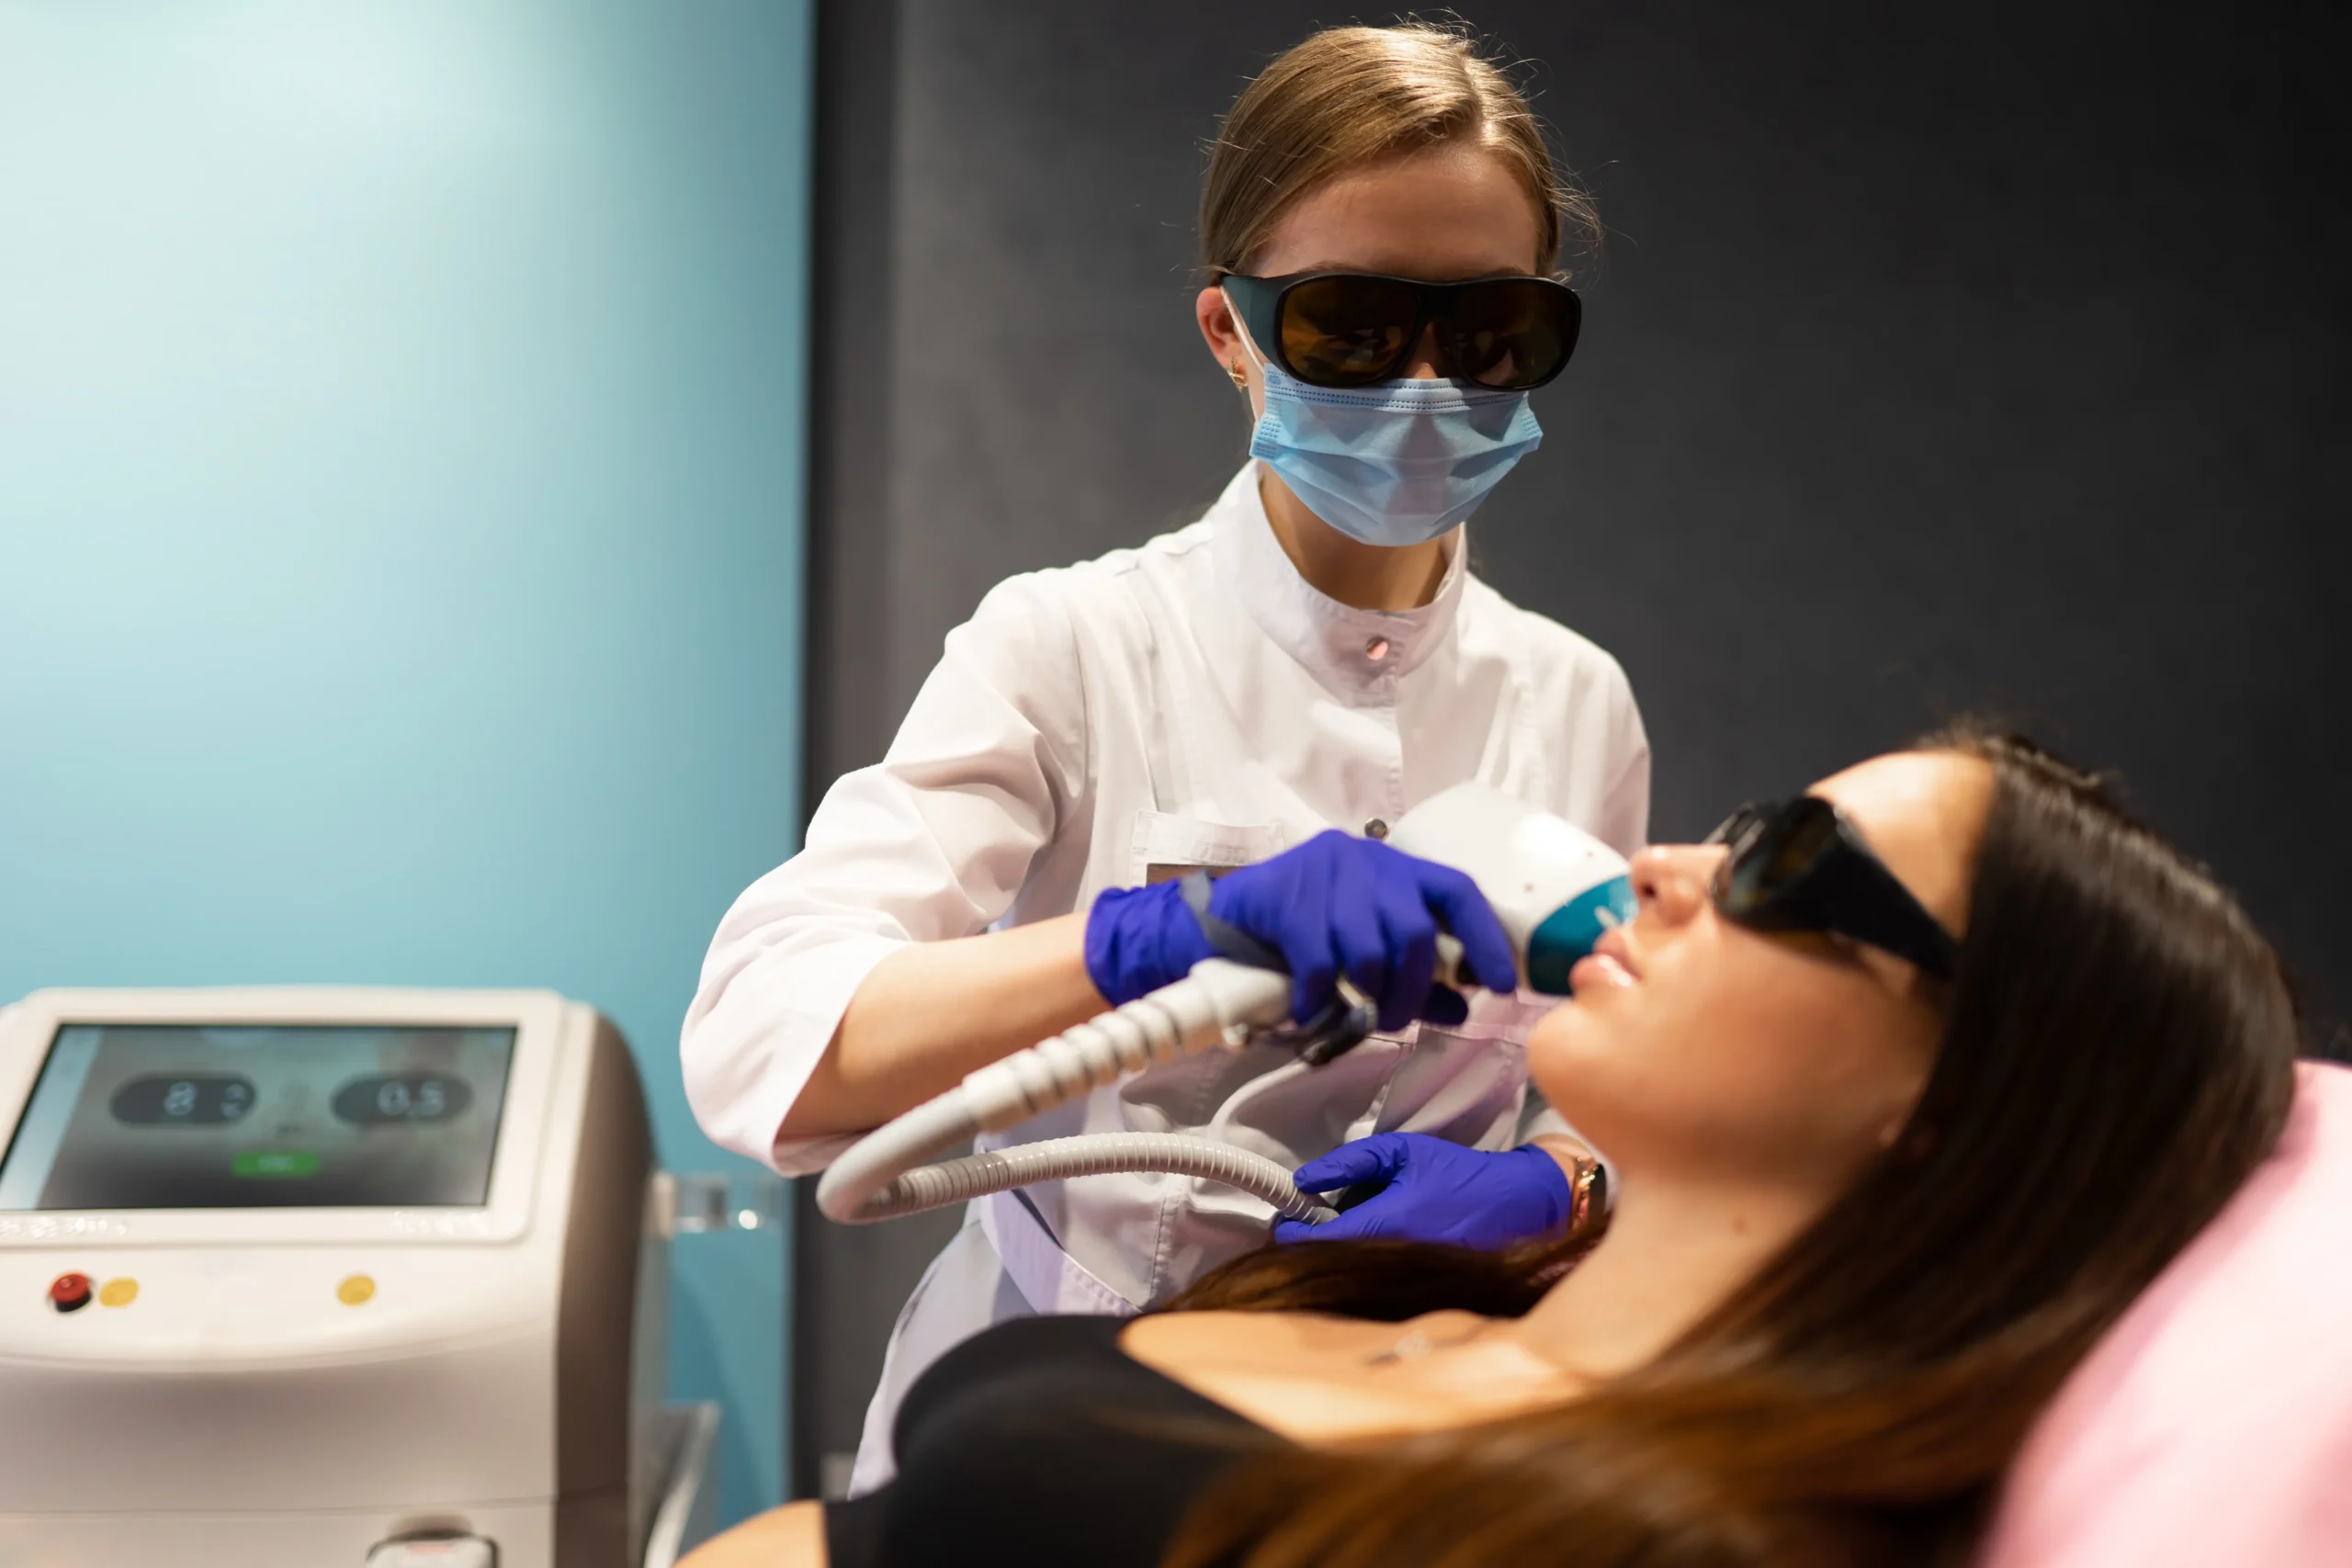
Contact Sapphire or Glass Tips
Many handpieces use a chilled sapphire or glass window. The tip sits on the skin and conducts heat away. You see the target through the clear window and deliver the pulse through it. This method gives precise cooling at the point of contact and is easy to time with the pulse.
- Pros: Good visibility and control. Works well for hair reduction and vascular work.
- Cons: Requires clean, scratch free windows. Excess gel or debris reduces optical quality and heat transfer.
Cryogen Spray Cooling
Some platforms spray a short cryogen burst on the skin before the pulse. The liquid evaporates and draws heat from the surface. Timing and volume matter, since overuse can mask endpoints or cause frost injury.
- Pros: Strong surface cooling with little pressure on the skin.
- Cons: Poor timing or too much spray reduces feedback. Requires routine nozzle and timing checks.
Cold Air Cooling
Stand alone devices blow chilled air across the skin during treatment. Air coolers work with many platforms and help with comfort, especially on large body areas.
- Pros: Easy to position and adjust. Useful for large fields and during multiple passes.
- Cons: Less precise at a single spot. Airflow can dry gel and affect coupling for some devices.
Timing: Before, During, and After the Pulse
Cooling has three phases. Pre cooling, concurrent cooling, and post cooling. Each phase serves a purpose.
- Pre cooling: Reduce surface temperature before you fire. Hold the tip in place for a short count or use a brief cryogen burst. Pre cooling lowers baseline temperature so the surface starts safer.
- Concurrent cooling: Maintain contact during the pulse. This buffers the surface from the rapid temperature rise created by absorption at the target.
- Post cooling: Apply brief cooling after a pulse or after a row. This removes residual heat and reduces discomfort. It also helps you manage heat stacking on large fields.
Match your timing to pulse duration. Short pulses need short, predictable contact. Long pulses may need contact held steady through the entire delivery. Avoid long stalls that overcool the surface and hide changes in color or texture that guide your endpoint decisions.
How Cooling Supports Safe Parameters
Cooling protects the epidermis while you set dose and timing to match the target. It allows you to stay near the top of the safe fluence window without crossing it. It also lets you use pulse durations that confine heat to the target while keeping surface temperature controlled.
- With fluence: Cooling widens comfort and safety but does not grant permission to exceed safe dose. If you raise fluence, inspect the endpoint after a test spot and adjust cautiously.
- With pulse duration: Cooling helps when you use pulses near the target’s thermal relaxation time. Keep pulse duration based on target size, then confirm safety with cooling and observation.
- With spot size: Larger spots drive energy deeper. Cooling becomes more important as penetration increases. Reduce fluence slightly when moving from 12 mm to 15 or 18 mm and confirm comfort.
- With repetition rate: Cooling helps control cumulative heat. On large fields, add short pauses and airflow between rows to reduce temperature rise.
Common Mistakes and How to Avoid Them
Relying on Cooling to Fix Unsafe Settings
Cooling cannot correct wrong wavelength choice or an unsafe fluence. Set parameters correctly first. Use cooling as support.
Overcooling the Surface
Excessive contact time or heavy cryogen masks endpoint cues. You may miss blanching, textural change, or early whitening. Keep timing short and consistent. Lift and check after a small test area.
Dirty or Scratched Windows
Residue and scratches reduce clarity and heat transfer. Clean tips with approved materials. Replace damaged windows. Check optics at the start of each session.
Inconsistent Pressure and Angle
Uneven pressure alters contact and refraction. Keep the tip flat, apply steady pressure, and maintain alignment. For curved areas, adjust your hand position and reduce overlap.
Ignoring Heat Stacking
Even with cooling, rapid passes can build heat. Slow the repetition rate on large fields. Add breaks between rows. Use air cooling during repositioning to keep the surface comfortable.
Comfort: How Cooling Changes the Patient Experience
Pain perception rises as skin warms. Cooling reduces nerve firing near the surface and keeps patients calmer. Calm patients stay still and follow instructions. This makes treatments faster and more consistent.
- Explain the plan. Tell patients they will feel brief warmth followed by cool contact.
- Use a standard script. Count down before the first pulses. Reassure during longer passes.
- Track comfort. Ask for a 0 to 10 rating during your first rows. Adjust pace and cooling based on feedback.
Better comfort does more than reduce pain. It builds trust and increases completion of multi session plans.
Maintenance: Keep Cooling Devices Ready
- Inspect tips: Look for scratches and clouding under bright light. Replace worn parts.
- Clean correctly: Use approved wipes. Avoid chemicals that etch or haze clear windows.
- Check temperature: Verify set points at the start of each day. Record values on your checklist.
- Manage gel: Use fresh gel when required. Spread a thin, even layer. Remove bubbles that scatter light.
- Service air coolers: Clean filters on schedule. Confirm full airflow. Position the nozzle close but not touching the skin.
- Review cryogen systems: Confirm correct spray timing and volume. Check nozzles for clogging.
Regular checks take minutes and prevent session delays. They also protect optical quality and temperature control.
A Short Cooling Workflow You Can Use Today
- Assess skin, recent sun, and medications. Shave hair when indicated. Remove makeup and oil.
- Choose wavelength for the target. Set pulse duration near the target’s thermal relaxation time. Select spot size for depth and field size.
- Place fluence inside the safe window for the indication and skin type. Set repetition rate that allows inspection.
- Prepare cooling. Confirm tip clarity and temperature. Position air nozzle if used. Confirm cryogen timing if the platform supports it.
- Pre cool for a short count. Perform a test spot. Observe the endpoint with minimal overcooling.
- Proceed in short rows. Maintain steady contact. Add quick post cooling after each row. Inspect and ask for comfort scores.
- Document parameters, cooling method, endpoints, and patient feedback. Adjust the plan for the next visit.
This step by step routine keeps sessions controlled and repeatable in any clinic.
Training and Continuing Education
Cooling looks simple at first glance. In practice, timing and technique matter. A small change in contact time or tip pressure can alter the surface temperature you create. In the Live Course, you will practice timing with different platforms and observe how cooling affects endpoints. The Online Course teaches the same principles with videos, quizzes, and case reviews built from published experience on ResearchGate.
Good cooling does not replace good parameter control. It supports it. Use both and your outcomes will improve in steady, measurable ways.
Common Questions
Does cooling let me raise fluence?
Cooling widens comfort and surface safety, but it does not grant unsafe dose. Use a test spot and adjust in small steps. Keep fluence within the recommended window for the indication and skin type.
Which cooling method is best?
The best choice depends on the platform and the indication. Sapphire tips give precise contact and visibility. Cryogen spray offers strong surface protection with careful timing. Air cooling helps manage comfort on large fields. Many clinics use a mix of methods.
How long should I pre cool?
Keep pre cooling brief. One to two seconds for contact tips is common. Very short bursts for cryogen systems. The goal is a consistent routine that protects the surface without hiding endpoints.
Can I overcool?
Yes. Overcooling masks color and texture cues and can lead to frost injury with cryogen systems. Maintain short cycles and inspect often.
What should I document?
Record the cooling method, tip temperature or cryogen settings, any air cooler settings, and timing notes. Document the endpoint and comfort scores along with standard parameters.
Ready to Use Contact Cooling With Confidence?
Use the steps in this guide during your next session. If you want coaching and case review, choose the training path that fits your schedule.